11.22.2011

Stockings for Kids Tutorial Tuesday: Herringbone Stocking

Hey guys! Crazy to think that November is almost over and with it the Stockings for Kids drive! I am so appreciative of everyone who has participated and I have got a lot of stockings so far. You still have plenty of time to make some stockings and send them my way -- don't forget all stockings need to be mailed by December 1 to give me enough time to stuff them and send them out to the kids before Christmas.

Also, here's a friendly reminder about the awesome giveaway from our sponsors that you should go check out. It ends at midnight on December 2nd.

Without further ado here's Katie's awesome tutorial which is perfect for a teenager and is seriously one of my favorite designs right now because I LOVE working with solids. And most people know how much I am obsessed with gray at the moment. In fact I think I am going to go make one of these stockings right now!

Herringbone Stocking Tutorial 

My name is Katie Blakesley, and I blog at Swim, Bike, Quilt.  I am happy to be sharing a stocking tutorial at Purple Panda Quilts today. I think Lyanna's Stocking for Kids drive is brilliant, and I will be sending her two stockings in the next few days. Knowing that you only have a week to make and send her a stocking before the deadline, and guessing that there are a lot of stockings made for the 5 and under set, I am sharing my simple Fit for a Teen Stocking Tutorial today.

Supplies: 
Favorite stocking (optional, for tracing) 1/3 yard solid fabric (Kona charcoal) assorted solid fabrics: gray, blue, and teal charm squares or scraps small strips of feature print 1/3 yard lining fabric (Kona white) 1/3 yard fusible fleece 2 strips of paper, 3 1/2'' x 11'' washable glue stick


Tracing Your Stocking
1. Trace your favorite stocking onto a large sheet of paper, or use Lyanna's template here. If tracing a stocking, add 1/4'' seam allowance around the entire stocking and cut out the paper template.
2. Fold the fabric for the outside of the stocking in half. Place the template on top of two layers of fabric, and pin. Using a rotary cutter (and ruler, where applicable) cut out 2 stocking pieces. 3. Fold fabric for stocking lining in half. Place template on top of two layers of fabric, and pin. Using a rotary cutter (and ruler, where applicable) cut out 2 stocking pieces. Set aside.

 Making the Herringbone Blocks 
The herringbone blocks are made from skinny string blocks. I cut strips no smaller than 1'' and no bigger than 2 1/4''.  You can cut them as small as 1'' x 5'', but need to pay attention when stitching them to paper. I recommend strips at least 6'' long. 
1. Reduce your stitch length--I reduce my stitch length from 2 to just over 1.  Choose a strip, and use the washable glue stick to glue it in the middle of one of the 3 1/2'' x 11'' pieces of paper.
2. Place a 2nd strip face down on the right side of the 1st strip, sew 1/4'' seam allowance along the edge. Open, press, and repeat, until you have covered half of the piece of paper.


3. Place a strip face down on the left side of the 1st strip, sew 1/4'' seam allowance along the edge. Open, press, and repeat, until you have covered the rest of the paper. 


4. Place paper face down on cutting mat, and trim around the edges. Remove paper from back of block.
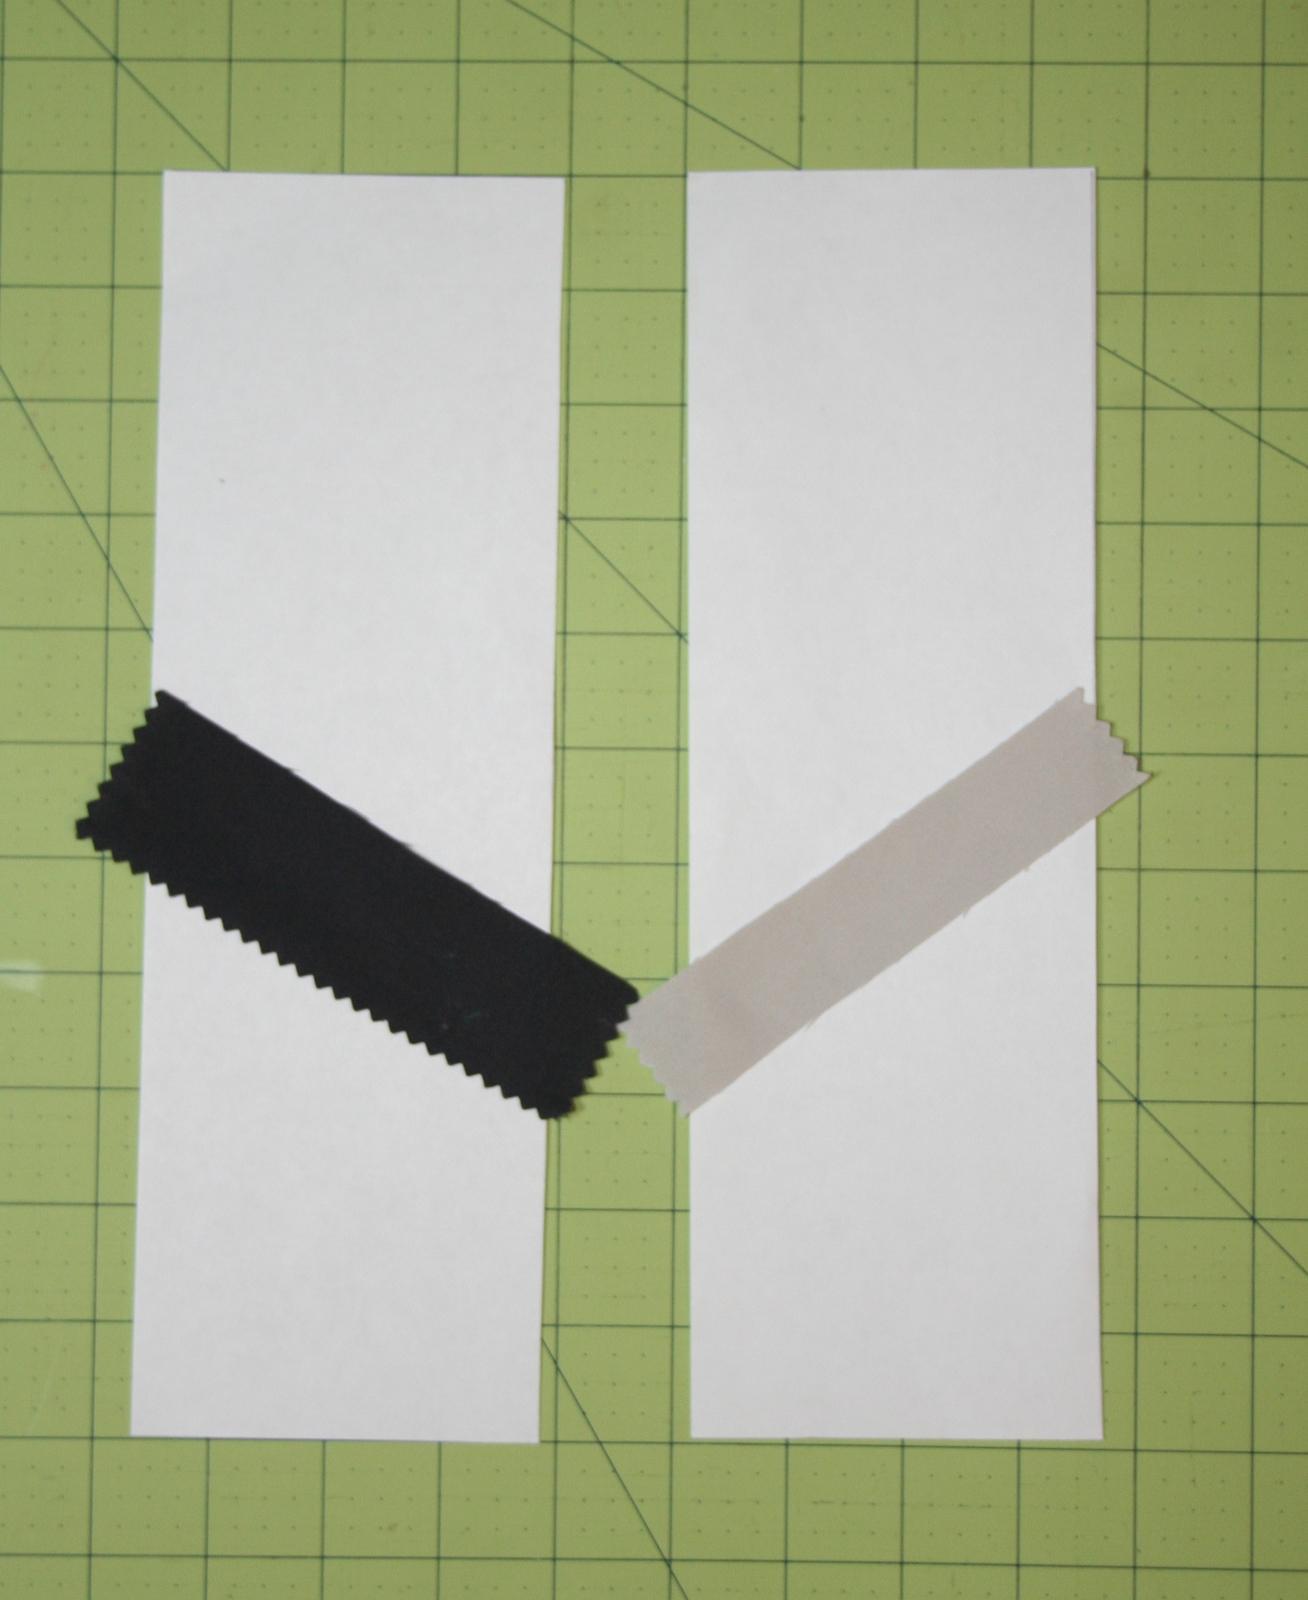
5. Repeat steps 1-4 with 2nd piece of paper. Make sure to place the 2nd strip angled differently as shown below, otherwise you will have diagonal stripes instead of a herringbone pattern.


6. Cut the herringbone strips into 3 1/2'' squares. Choose three squares, and sew them together, end to end. 7. Place the herringbone strip over the stocking. When you are happy with placement, cut out a 3 1/2'' strip from the stocking. Sew the herringbone strip in it's place, and stitch.


Quilting the Stocking
I kept the quilting on this one simple, just a few sets of straight lines. I tried to picture the 12 and 14 year old boys that I know, and didn't think they would like anything too fussy.  
1. Fold the fusible fleece in half. Trace your original stocking onto the fusible fleece, and cut out. Note: This will be 1/4'' smaller than your stocking. This is correct, that way the fleece isn't in the seam allowance.
 2. Fuse the fleece to your 2 outer stocking pieces according to manufacturer's instructions.
 3. Quilt the front and back as desired.


Assembling the Stocking
1. Place the outer stocking pieces right sides together. Using a 1/4'' seam allowance, stitch around the sides, leaving just the top open.  Press seams.  Clip the curves and turn the stocking inside out.
2. Using one of the strips, make a fabric tab (I took a 2 1/2'' x 5 strip, placed right sides together, and stitched a 1/4'' seam allowance along the side. I turned it right side out, folded it in half, and stitched along the sides and through the center). Line up the raw edge of the fabric tab with the top of the stocking, stitch 1/4'' seam allowance, back stitching several times.


3. Place the lining pieces right sides together. Using a 1/4'' seam allowance, stitch around the sides, leaving just the top open. Clip curves and keep lining inside out.  Press seams.
4. Place the outside of the stocking inside the lining, right sides together. Stitch 1/2'' around the top of the stocking, leaving a 4 inch hole on the back. This is where you will turn the stocking right side out.


5. Turn the stocking right side out.  Press top seam well. Either hand stitch the opening closed, or iron well and top stitch around the top of the stocking.


Congratulations! Your stocking is finished! 
Admire it for a moment, tell your friends, and send it off to Lyanna!!!

11.21.2011

My "Rebellious" Weekend

This weekend my dashing husband spent most of his time studying for an endocrine exam. This left me lots of time to do whatever my heart desired. Of course I immediately wanted to spend some quality time with Nina (my sewing machine) who I have been neglecting as of late...so I did, despite being on my sewing hiatus.

Now before you get all upset about me ignoring doctors orders and the like, I promise I stopped whenever my wrists/hands started to hurt a lot. So it was somewhat slow going. But I did manage to complete a few projects.

First up I completed a quilt and it is easily one of my favorite quilts ever. I know I say that almost every time I make a new quilt, but I am seriously in love with it. I want to show you all so badly but can't reveal it yet. But here's a teaser shot:


Next up I conquered my fear of the zipper. 


As you can see I made myself a little coin pouch with scraps from my previous quilting projects....I even lined it! It wasn't as hard as I thought it was going to be and I definitely see a few more projects involving zippers in my future.


What did you do this weekend? Were you at all a little bit rebellious?


PS - don't forget to enter the stockings for kids giveaway!

11.20.2011

Stockings for Kids Giveaway!!

It's giveaway time!

First off a massive thank you to everyone who has donated a stocking so far - my mailbox has been flooded with stockings and I'm sure my postal worker has been very appreciative of the extra packages she's had to deliver in the past month. Keep them coming! =) Also, don't forget all stockings need to be mailed to me no later than December 1!

Anyway to refresh your memory, here are the awesome prizes up for grabs:


$50 gift certificate to the Fat Quarter Shop.

The Fat Quarter Shop is one of my favorite places to buy fabric online - they have such a great collection of fabric and quilt kits. I highly recommend their bloggers choice series where different bloggers put together a fat quarter bundle of their favorite fabrics for you to purchase (so fun!). And the best part is you don't have to wait weeks for your newly purchased fabrics to arrive at your doorstep with their same day shipping policy.


Sweetwater fabrics have so generously donated a countdown to christmas charm pack.

This is sure to be a perfect addition to your holiday sewing. They produce such fun fabric - I love the way they incorporate typography into their designs.


One of my favorite quilting bloggers, Jacquie, who blogs at Tallgrass Prairie Studio has generously put together a fat quarter pack featuring 2 prints from Kate Spain's 12 days of Christmas line and 2 colors from the peas and carrots line.


Brenda at Pink Castle Fabrics has donated a "mystery" red and green fabric bundle. Her Etsy shop is full of beautiful fabrics - including to die for fabric bundles - and she is such a joy to work with.


Giveaway Details:

1. You MUST link up a picture of your stocking that you made (one picture per stocking)
2. An extra entry is given for helping to spread the word (tweet, blog, facebook, etc) and letting me know in the comments
3. An extra entry is given for being a follower of my blog

The giveaway ends at midnight on December 2. Winner will be announced December 3 on my blog.


11.19.2011

November Quilting Bee Blocks

This month I have managed to finish all my quilting bee blocks before they were actually due! Yay!

Do.good. Stitches:

This month we got to make some bottled rainbow blocks following Rachel's tutorial. I have been wanting to try this for ages so I was so super excited when Becky chose this as her block for the month. Here are my two blocks:

Kona Berry Block (dark purples)

Kona Raspberry Block (dark pinks)

I loved making these blocks and see more of them in my immediate future...and there is something to be said for the quilt-as-you-go method that these use.

Sew Bee Beautiful:

This month it was Ella's turn to send out fabric and she requested some wonky stars. At first I was a bit nervous to make these, having never made a wonky star but I am pretty pleased with how these turned out. I'm sure her quilt will be quite beautiful! Now please don't mind the severe lack of ironing in these photos, I'm still looking for an iron...


Mod Mosaic Charity Quilt

This isn't a "bee" parsay, but earlier this month Kelsey asked for some help in making mod mosaic quilt squares using gray, orange and blues for a family who has had one bad thing after another happen to them -- house fires, hospital stays, car accidents, etc. You can read more about her request for blocks (and sign up to make one) here. These blocks are super easy to make and are excellent for using up stash. I enjoyed making this block and wish that I had time to make more.