10.30.2011

Bloggers Quilt Festival: Citrus Sails!!


I am so excited because it's time for the Bloggers Quilt Festival over at Amy's Creative Side. Twice a year she hosts an awesome linky party where bloggers can link up a quilt of their choice. I have seriously been looking forward to this for quite sometime...and not just because I have something to share for the first time - but because there is always a ton of inspiration to be found.

Anyway so I put my thinking cap on and was trying to decide what quilt I wanted to share. I wanted it to be something I was really proud of and that would showcase who I am as a quilter/designer. I had one in mind that was almost finished (dang binding needs to be sewn on!), but due to my recent hand injury that would have to wait. So I decided to show the Citrus Sails Quilt. Yes, I know I recently blogged about it (in hindsight, I could have waited to post that until today but I was too excited to wait) but now you can read about it all over again! =)


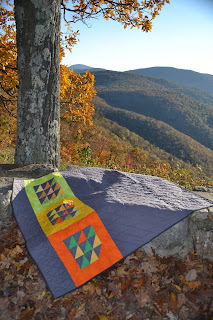
 I am seriously am in love with this quilt. I was lucky enough to have some help piecing it from my fellow uber talented members of the Inspire Circle of the do.good.stitches charity sewing bee. I think that this quilt reflects my quilting style - simple, bright, a bit different and incorporates the use of solids. When I first designed this quilt, I knew I wanted to feature triangles and at the time I was enamored with half square triangles and thought it would be a great bee quilt. Having spent many days in a hospital myself, I wanted to create a quilt that could bring some cheerfulness to an otherwise drab hospital room. I immediately thought of bright citrus colors paired with gray. The gals in the circle did an awesome job of helping make my vision into a reality.


As much as I love the front of this quilt, I almost love the back more. Originally I was going to use a solid gray back but since I had 3 leftover squares, I decided to highlight them in each of the colors and sew a strip down the back. I really like this effect. I am a fan of solid on the back because I think it showcases the quilting, which I quilted on my machine in straight lines on a diagonal to bring some dimension to the quilt.


I finished it up with a dark gray binding (kona pepper, I believe) which I think frames it nicely. After I washed it and took it out of the dryer I took it up to the mountains for a photo shoot. And as luck would have it the bright summer colors looked nice against the fall leaves. Yay.


Lest you think that this entire experience was a cakewalk - think again (lining up all those points was a nightmare!) I also chose this quilt to showcase because I learned a very important lesson: Sometimes it is the imperfections that make the quilt perfect. Yup that's right, who cares if the points don't all line up. It still looks great at the end!


Anyway I'm going to sit back with my Starbucks salted carmel hot chocolate (aka the best fall drink ever) and spend some quality time being inspired by the many quilts at the bloggers quilt festival. Join me. But first go get a salted carmel hot chocolate, you'll thank me later - trust me.

10.28.2011

Quilting Injuries: Or how I spent my friday afternoon

One thing nobody told me when I first got into quilting was that it could be a dangerous hobby.

Expensive? Yes.

Time intensive? Yes.

Invade your office/living room storage? Yes.

Dangerous? No.

Well let me tell you fellow quilters, quilting can be dangerous. And I'm not talking about the run of the mill oops I sewed through my finger kind of dangerous. I'm talking need to see a doctor right away because it hurts so bad get x-rays and then see more specialists type of dangerous.

Apparently quilting can give you carpal tunnel (I have conveniently linked you to webmd in case you are not fortunate enough to have a future doctor living with you) or maybe tendinitis or maybe some mysterious ailment that can as yet be identified due to the immense amount of inflammation in your wrist.

As of this moment I have been told to limit the use of my wrist for the next week or so which means that all the projects on my to finish list will remain yup, unfinished for the time being. In fact if my husband saw me typing he probably would get angry so I'm off to go take my medicine and watch movies.

So word to wise for all you quilters/sewers out there...be careful!

10.26.2011

Celebrate Color: Fall Leaves

Rachel, who blogs over at Stitched in Color, is hosting this awesome series called Celebrate Color. The basic idea is to make something inspired by fall colors and you can enter it in her contest to win some awesome prizes. The deadline for October has passed, but you can get your thinking cap on and start to plan something to enter in November. You should definitely check it out!

With this in mind, a few weeks ago I spent the weekend in the mountains with my dashing husband. It was gorgeous! We got up before sunrise every day to take some beautiful pictures and I was so inspired by the fall leaves. I think I took hundred of pictures of them. There was something about the reds, oranges, yellows, greens, and browns against the blue sky that spoke to me.


Nature really inspires me and I came home with a few new quilt ideas. Stay tuned for info about them in the next few weeks.

What inspires you?

**Don't forget to enter the Kate Spain fabric giveaway!**

10.25.2011

Stockings for Kids Tutorial Tuesday: Appliqued Stocking


Well it's that time of the week again - time for another stocking tutorial. Today's tutorial is brought to you by none other than the lovely Carol from her adorable blog FunThreads. Be sure to go show her some love if you like her tutorial!

Also don't forget to check back next Tuesday for another stocking tutorial from Jeni of In Color Order.


Fusible Applique Stocking Tutorial
**My stocking does not use batting but it is lined.**

If you are new to fusible applique you can find a detailed tutorial HERE.


Supplies: 
Stocking pattern drawn on 11 x 14 paper (one is available for free HERE)
Applique pattern printed out (see below)
1/3 yard of stocking fabric
1/3 yard of lining fabric
1/4 yard of cuff fabric
Scraps of white (face & snowflake), orange (nose), green (scarf)
Scrap of ribbon for hang tag
2 large buttons
1 sheet of Steam-A-Seam 2 lite


Applique Pattern:
Save and print this pattern sheet. There is a 1-inch scale marked on it for correct sizing.


Directions:
Cut two stocking pieces and two lining pieces using your pattern and set aside.

Trace applique pieces on to the Steam-A-Seam. The pattern is already reversed and ready to trace.

Rough cut around the pieces to separate them.
 Peel off the paper backing and fuse the pieces to the back of your selected fabrics.


Cut out the pieces and place them on the stocking fabric. Leave approx. 4 1/2 inches above the snowflakes for the stocking cuff.
Fuse the pieces in place according to package directions.


Trim the bottom of the snowman if he hangs past your stocking edge.


 Stitch around the pieces using the method of your choice and add the button eyes. I used a shortened straight stitch.


The applique design is complete. Since there is exposed stitching on the back of the design I would suggest finishing the stocking following the Lined Stocking Tutorial found HERE.


If you have any questions just ask.


Enjoy!

10.23.2011

R.I.P. Iron

Well my iron died today. Sadness. How am I going to finish all the piles of quilting projects that are in my sewing room now?


I am currently taking suggestions for what type of iron I should now purchase.

Click here to sign up for the early bird giveaway

10.20.2011

Stockings for Kids Early Bird Giveaway!

I'm excited to announce the first round of giveaways for the Stockings for Kids campaign! I am so appreciative of everyone that has donated a stocking so far. As a reward, I've decided to do an early bird giveaway.

Here are the prizes up for grabs:

A Set of Fat Quarters donated by Kate Spain from her 12 Days of Christmas collection.


And a second lucky person will win an Advent Calendar Kit


More exciting prizes will be available in December!

To Enter:

1. Leave a link to your completed Stocking for Kids stocking (1 link per stocking you are donating).
2. Spread the word about the Stockings for Kids drive on your blog (link to your blog post in the comments)

Bonus Entry:

If I receive your stocking before Nov 2, then I will give you an extra entry.


Giveaway ends at midnight (EST) on November 2.

Winner will be announced on my blog November 3.

10.19.2011

Citrus Sails Quilt


Front of Citrus Sails Quilt
Back of Citrus Sails Quilt

As part of the do.good.stitches charity bee, I've been quilting the top from my month. This entire project has been somewhat of a nightmare to be honest and I was about ready to throw in the towel on multiple occasions. Nevertheless, I persevered and I learned quite a few lessons along the way.

Lesson 1: Being a perfectionist isn't always perfect.  My design involved many half square triangles and lining up the points gave me a headache. I spent hours sewing and unpicking blocks together in an attempt to get them to line up perfectly. Luckily, my husband intervened. He told me that the Native Americans intentionally put a mistake in any handmade thing they make to show that it is created with human hands and humans are imperfect -- acknowledging that only God is perfect. I thought that was a rather interesting way to look at things. So I decided to embrace my inner imperfections and sew together the blocks to the best of my ability.

The front of the quilt - you can't even tell that some of the points don't line up perfectly!

Lesson 2: Sometimes simple is better. When I went to quilt it, I had a complex plan in my head and ended up with some (okay a lot) of puckers on the back. I couldn't for the life of me quiet the perfectionist side of my brain and I spent the better half of a day unpicking the quilting. Then I redid it in much simpler way and I like it much better.

The quilting - diagonal straight lines.

Lesson 3: Machine binding a quilt isn't the worst thing. I've always been opposed to machine binding (mainly because I couldn't get it to look the way I wanted) and have spent hours hand sewing my bindings. But because I was so behind on the deadline for this quilt, I bit the bullet and bound it by machine. And ya know, it doesn't look half bad.


What lessons have you learned while quilting?

10.18.2011

Stockings for Kids Tutorial Tuesday: Confetti Christmas Stocking


Happy Tuesday folks! Before I get down to the nitty gritty stocking tutorial info, I just wanted to say a giant thank you to everyone who has agreed to participate in the stocking drive so far. The kids will be so excited when they get their stockings! 

Today's edition of tutorial Tuesday is sponsored by Kate Spain. She has generously donated some of her 12 Days of Christmas fabric for the stocking drive. I don't know about you, but I love Kate's designs and always look forward to her fabric lines. The Fat Quarter Shop has a wide selection of her fabric - go check it out, you won't regret it - trust me!

Also don't forget to check back next Tuesday for another stocking tutorial brought to you by none other than Heather from Olive & Ollie. Also keep your eyes peeled for more information about an upcoming giveaway for Stockings for Kids participants! 

Confetti Christmas Stocking Tutorial

Materials:

- Stocking pattern (available for free HERE)
- 65 assorted pieces of fabric cut into 2.5x2.5 inch squares, for the patchwork on front of the stocking
- 1/3 yd fabric for back of stocking, cut into 1 11x17 inch piece
- 1/3 yd fabric for inside of stocking, cut into 2 11x17 inch pieces
- 1/3 yd low loft batting, cut into 2 11x17 inch pieces
- 1/4 yd fabric for cuff of stocking, cut into 2 5x7 inch pieces and a strip of fabric 1.75 x 5 for hanging tag

Instructions:


1. Cut your patchwork squares. 


2. Arrange your squares randomly into a grid that is 9 rows of 7 squares each. You can move them around to find an arrangement that you like. 


3. Sew the squares into rows. I recommend chain piecing them together to save time (and thread!)


5. Iron the rows and arrange them into a rectangle.  


4. Sew the bottom 2 rows right sides together. Repeat this process until you have sewn all 9 rows together.


5. Now your patchwork front is complete. To finish, follow steps 2-12 of the Super Simple Stocking Tutorial. Or you can finish it with lining it using Allison's tutorial.


5. Voila! Now you have a finished confetti patchwork stocking. 


As always, if you have any questions, don't hesitate to ask!

10.15.2011

Weekend Escape


Well this weekend my husband and I will be bonding with nature, celebrating the end of renal, and enjoying the fall leaves in the ever so beautiful Shenandoah Mountains. I'm off to go enjoy the outdoors and hopefully see a bear or two. And who knows, maybe I'll even come back with a few new project ideas to share.

Also, don't forget to check back Tuesday for the next installment of Stocking for Kids Tutorial Tuesday featuring some of my most favorite holiday fabric ever!

So ta ta 'til Monday folks!

10.12.2011

Mystery Fabric Love

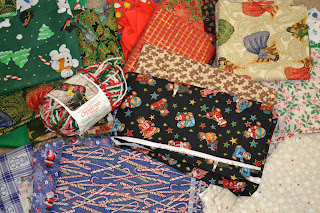
Yesterday afternoon, I came home to find a massive package waiting on my front porch. Imagine my surprise when I found all of this inside:


That is loads (yards and yards) of Christmas fabric donated for the Stockings for Kids Charity Drive. I was seriously so blown away, I didn't even know what to think.

I immediately sat down on my living room floor and began to sort through the various fabrics. I really like this snowman print - it's so cheerful and I think it will make adorable stockings.


I also love this happy santa print - he's so cheerful!


I like this print because it is a bit unexpected with the black background, but I think the teddy bears are super cute and I really like the bear playing with the trains.


And there has to be about 5 yards of this beautiful fabric that I think will be perfect for the lining of the stockings.


What? You want to see all that loot again? Well, if you insist.


So thank you mysterious fabric donator! You rock!

If anyone else would like to send any unused Holiday fabrics my way, I'd greatly appreciate it and promise that they will be made into beautiful holiday stockings.

10.11.2011

Stocking for Kids Tutorial Tuesday: Lined Stocking with a Cuff

Allison over at Cluck Cluck Sew has generously agreed to share her tutorial for a lined stocking with a cuff. So without further ado - here's Allison's tutorial. Go check out her blog for some more inspiration...and don't forget to post photos of your stockings to the flickr group.
----

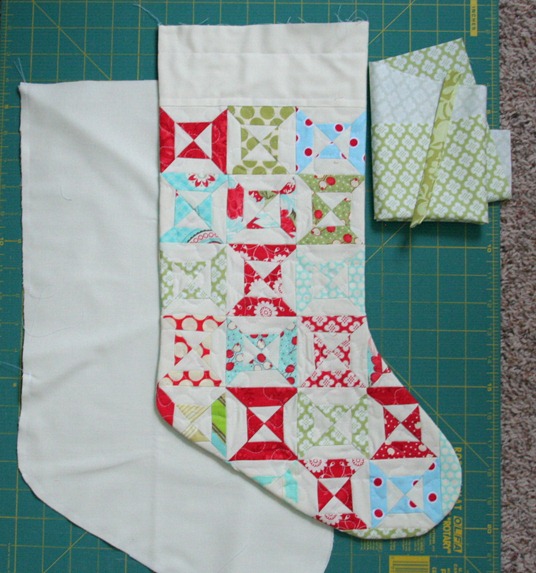
Ok so this took me 2 days of staring at a stocking to figure out. My mind just doesn’t work in the turn it inside out then right side in then right side out and do the hokey pokey kind of way. So here’s a quickie tutorial mainly for my own sake so I remember how. If you want an actual pattern for the quilted parts, as well as templates for all the pieces, you can find a great pattern here.

Start with:
- the outside of the stocking, already sewn together with the back and turned right side out. (the front of my stocking is quilted with batting, the back has no batting)
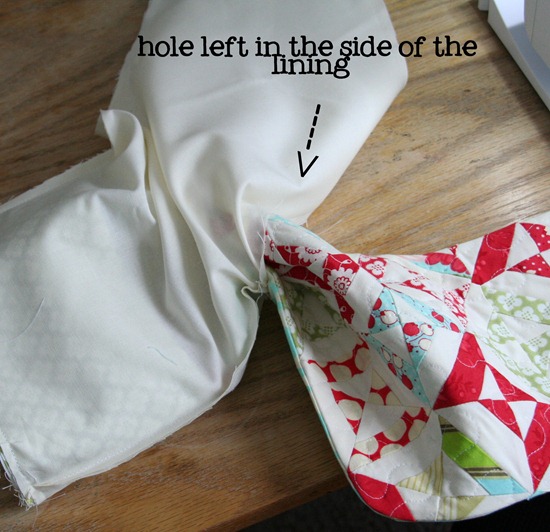
- the lining of the stocking sewn together ( leave a 3” hole in the side for turning!) right sides in.
- fabric for the cuff
- a sewn tab of fabric for hanging tab
IMG_7017

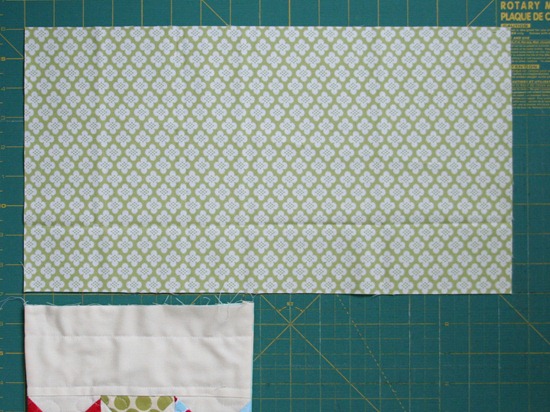
To figure out how wide to cut your cuff fabric….measure the width of the top of your stocking, double that number and add .5 inch for the seam allowance. For the length of the cuff I cut my fabric 9”…to give me a 4.25” finished folded cuff. So this piece was 9” x 16.5”
IMG_7018

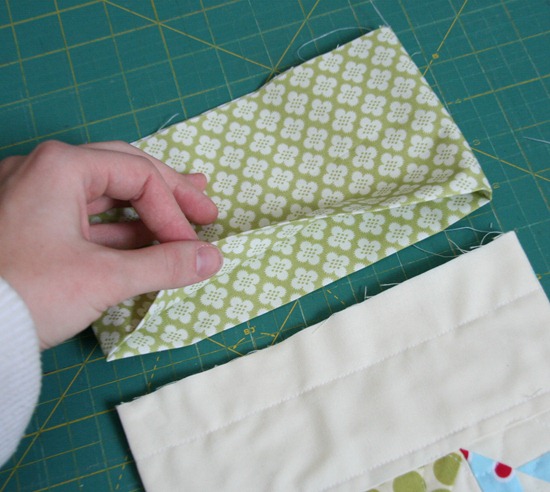
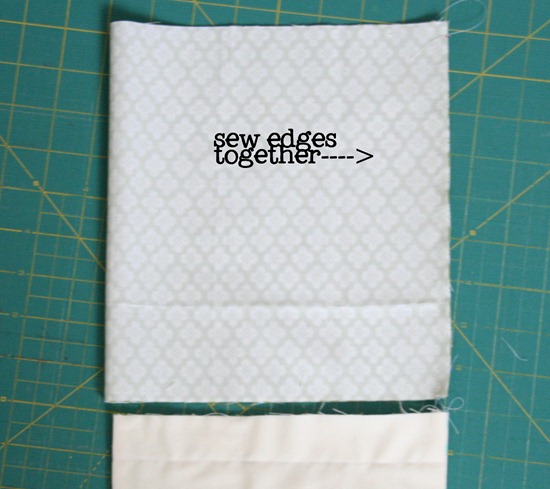
Sew together the 9” ends of the cuff piece, use a 1/4” seam allowance.
IMG_7020

Turn the cuff right side out so its folded at the bottom and raw edges are at the top. It should make a tube you can stick the stocking in.
IMG_7022

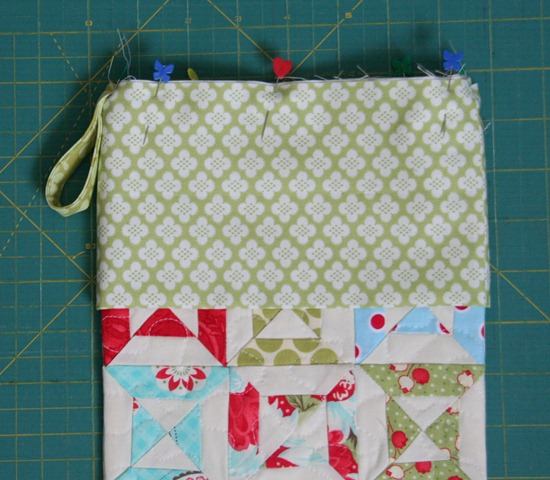
Stick the cuff on and around the top of the stocking, match the raw edges and pin. You can pin the tab onto the side now also.
IMG_7025

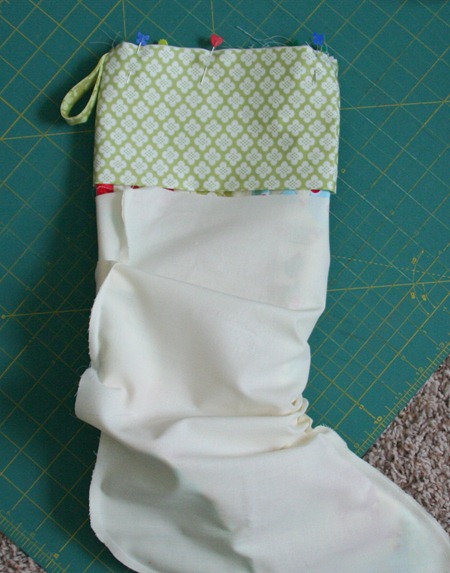
Stick the whole thing into the lining. The stocking and lining should be right sides together.
IMG_7027

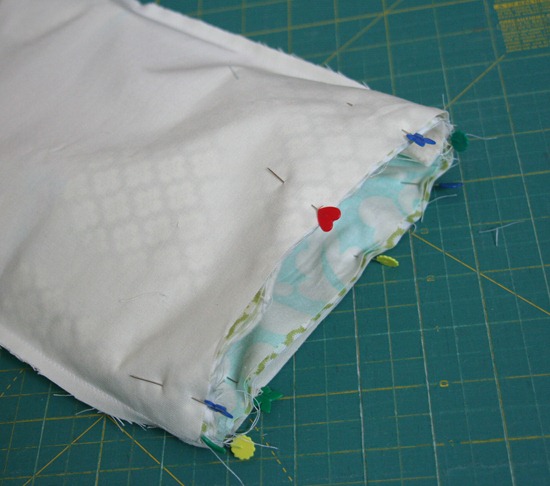
Pin all of the raw edges together at the top (lining, 2 cuff edges, and stocking edges).
IMG_7028

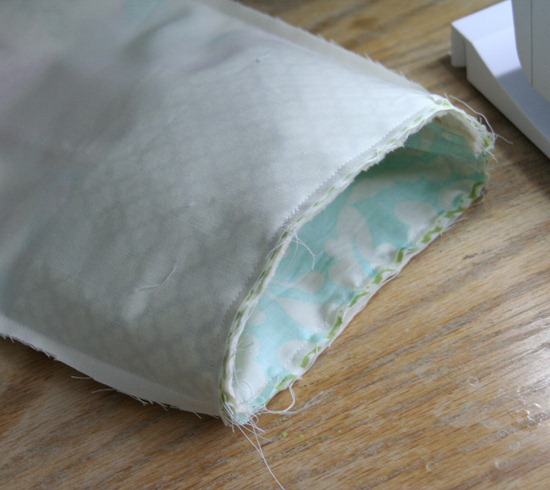
Sew all the way around the top. Make sure you catch all the layers (lining, cuff edges, stocking).
IMG_7031

Turn the whole thing right side out using the hole left in the side of the lining.
IMG_7032

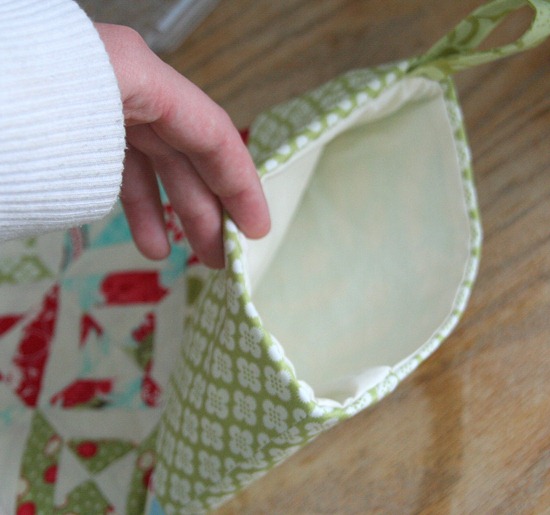
Finish turning it inside out and sew up the hole in the side of the lining. Stuff the lining inside the stocking and fold the cuff down. Press the edges as needed.
IMG_7033

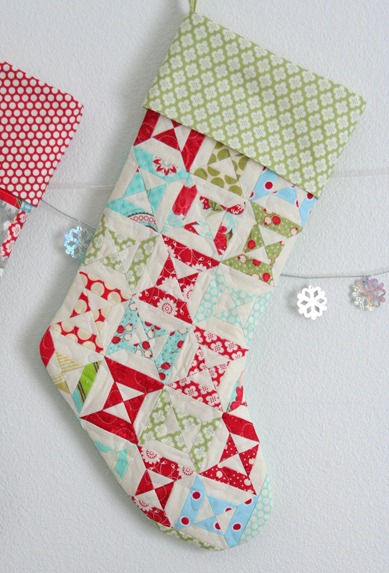
When you’re done you’ll have a nicely lined cuff and stocking with no raw seams showing.
IMG_7039

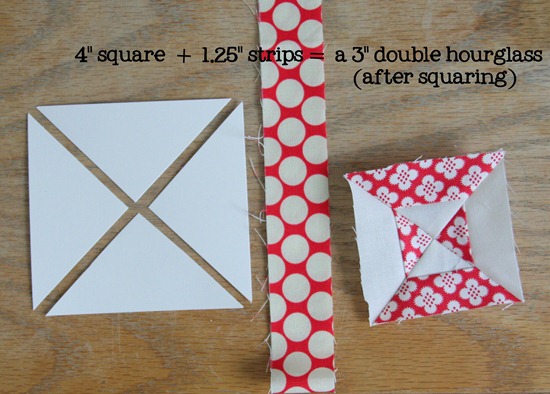
If you want to make these little double hourglass blocks I used my tutorial but changed the sizing of the template and the strips shown below:
IMG_7016