Oh and don't forget to enter the Stockings for Kids giveaway to win all sorts of cool prizes from the sponsors of the drive!
Anyway here is her adorable felt garland stocking.
Felt garland stocking tutorial
Materials - Old stocking for tracing or there is a template available for free HERE (printed on 11x17 paper)
- 1/3 yard of outer fabric
- 3/4 yard of lining fabric (will be enough for 2 stockings)
- 1/3 yd quilt batting
- 1/4 yard of cuff fabric - 1/8 yard of felt - 6" length of ribbon or bias tape for hanging loop 1.
First, either trace a stocking that you already have, or use the template stocking to make your pattern pieces. For this stocking, make sure the width of the opening of your stocking is at least 8" so you can fit the stocking around the arm of your sewing machine later in the tutorial. You can always modify your stocking pattern to make it wider if the stocking you are tracing is skinnier than 8".
2. Cut your pattern pieces.
a. You'll need 2 outer fabric pieces. If you're using a print, make sure the fabric is folded in half to cut your pieces out, as you'll actually need the pieces to be a mirror images of each other so the print will shown on both sides of your stocking.
b. Cut two pieces of fabric for the outer cuff (which won't actually show when it's folded over), that are 6.5" x the width of your stocking.
c. Cut two pieces of fabric for your inner cuff (which will show when the cuff is folded over), that are 4" x the width of your stocking.
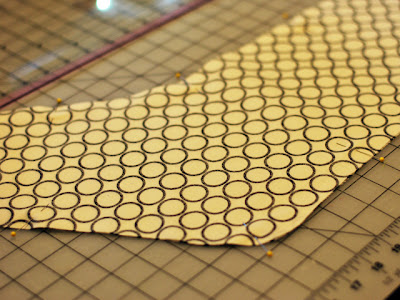
a. Trace your outer stocking piece onto two layers of quilt batting, adding an additional 6.5" to the top of the stocking.
3. Sew the outer cuff to the outer stocking pieces, right sides together, using a 1/4" seam allowance. Press seam allowances open.
4. Sew inner cuff to inner stocking pieces, right sides together, using a 1/4" seam allowance. Press seam allowances open. 5. Baste outer stocking pieces to batting pieces (I used spray baste).
6. Cut about 15 small felt circles (mine were a little over 1" in diameter).
7. Arrange the felt circles on the outer stocking piece that you want to be the front. It might be easier to draw on the garland lines with a disappearing fabric pen before placing your circles. Then pin the felt to the stocking.
8. Using a walking foot, sew along your traced garland lines in contrasting thread. I actually sewed along each line three times to make the stitching stand out a little bit more.
9. Quilt the cuff of the stocking and the back outer stocking piece however you'd like. I used random straight lines.
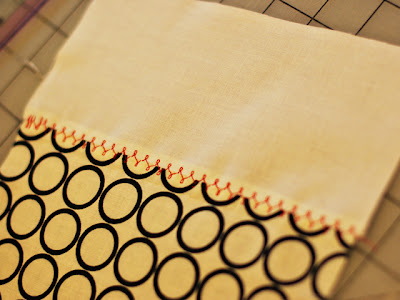
10. If you want to add decorative stitching along the seam where the lining meets the inner cuff, add it now.
11. Pin your outer stocking pieces right sides together. Trim any excess length of the quilt batting along the top of the cuff so it matches your outer stocking fabric. Sew along the sides and bottom of the stocking using a 3/8" seam allowance. Do not sew the top edge of the stocking.
12. Pin your inner stocking pieces right sides together.
13. Cut a 6" piece of ribbon or bias tape to make a loop to hang your stocking from. Fold it in half lengthwise and pin it into the side of the lining on the heel side of the stocking, 3" down from the seam where your lining and inner cuff meet. The edges of your ribbon/bias tape should be along the edge of your fabrics, as shown here, with the loop part in the middle of the stocking (I pulled it out of my seam a bit here, you can align the edges with the edges of your lining).
14. Sew along the sides and bottom of the lining using a 3/8" seam allowance, leaving a 3"opening on one of the sides for turning. Do not sew the top edge of the lining. 15. Clip the curves of your outer stocking and lining pieces.
16. Insert the outer stocking into the lining, right sides together. Match up the seams and pin along the top edge of the stocking.
17. Sew along the top edge of the stocking, using a 1/2" seam allowance.
18. Turn the stocking right side out through the opening in the lining. Slip stitch the opening closed, press the stocking, and topstitch along the top edge of the stocking.
19. Fold down the cuff and hang your new stocking!


1 comment:
Great idea, Holly!
Post a Comment