Today I am excited to share with you a tutorial for this fantastic fall table runner. I used chicopee by Denyse Schmidt with some Essex Linnen.
Materials:
2" wide strips in various lengths of 11 different prints (I used a fat quarter stack of DS prints - there is still plenty leftover)
2 2" x 33.5" fabric pieces for border
2 2" x 20" fabric pieces for border
38" x 21" piece of fabric for backing
2" wide strips in various lengths for negative space
1 fat quarter for binding fabric
58" x 21" piece of batting
Thread
Rotary Cutter
**note: I used a yard of fabric for the backing, negative space, and borders with a little bit left over**
Instructions:
1. Choose an order for your fabrics.
2. Cut and iron all the pieces. See the diagram below for the measurements I used - or you can feel free to turn this into an improv project and sew strips of various lengths together to create a similar effect.
3. Make rows by sewing A to B, D to E and then AB to C and DE to C.
4. Repeat for each row. I found it helpful to stack the pieces of each row on top of each other and pin. I also numbered each row.
5. Sew the rows together.
6. Press and add borders. First, add the longer sides and then add the shorter sides.
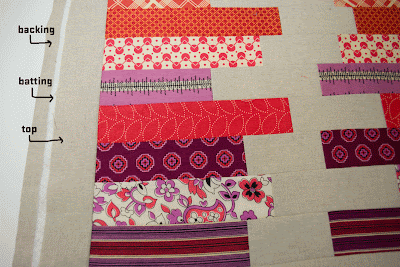
7. Make a quilt sandwich by layering the backing (right side down), batting, and table runner top (right side up)
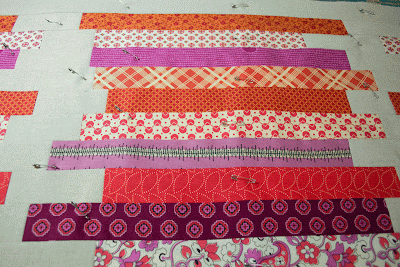
8. Pin baste.
9. Quilt as desired. I used a metallic gold thread and quilted in horizontal rows .75" apart. I really love the shine the thread gives to the finished project.
10. Bind - I bind by machine. Katie has an excellent tutorial if you need help.
11. Voila! Now you are finished and you can enjoy your new fantastic fall table runner!
I hope you enjoyed this tutorial -- and if you'd like to make one just like mine, check back tomorrow -- I will be giving away a fat quarter stack of chicopee.


4 comments:
Absolutely stunning! I love it!
Great tutorial! Love the colors, fabric choice and layout!
Great tutorial I love the design even for a full size quilt. Gorgeous.
Great tutorial- lovely colors ;)
Post a Comment